Thursday, May 21, 2015

Corel Paintshop Pro X7 - Perspective Error Correction - Hurrah!

The perspective error gets me every time when I take photos for the blog.   My arms are too short (even with the kitchen step stool) and the fabric too long...  Today, I stumbled upon the perspective correction tool in Corel Paintshop Pro X7.   At last!   A solution!   So easy!  This is big!   You can see in the original photo below that the perfectly rectangular cardboard auditioning frame is narrower at the top and wider at the bottom of the photo.   Yep, classic perspective error...
Original photo complete with feet on kitchen step stool and perspective error. 
   I cropped the photo to get rid of the feet and positioned the 4 corners of the perspective correction tool's box..
Perspective correction tool being used.
I cropped the photo again, then admired the nice straight cardboard frame.  Success! 
Photo with corrections completed.

There are various suggestions out there for getting different vantages on your artwork.   For example, you can turn the artwork 90 degrees, view it from a distance, squint at it or look at it thru a camera lens.   Anybody have any other suggestions for "seeing" your artwork?   The auditioning frame can only be in one position at a time, so the camera gives me the ability to compare options too.  It's so much better to compare the options without the distortion.

Here are two different frames of a single piece of fabric being auditioned.  Because I'm collaging on these backgrounds, it becomes important to determine what I wish to be seen and what can be covered up.  I like the way the darker reddish-purple color helps frame the top photo the best.

Two auditions of the same piece of fabric using a cardboard frame as a view finder.
If you're grazing the Internet late at night and could use a chuckle, I offer up the girl geek band, "The Doubleclicks."  The "Hollywood Raptor" song is especially for those of you who also feel short in the arm when photographing your work...

Tuesday, May 19, 2015

Cardboard Auditioning Frame and "The Luminous Ground"

The life cycle plan for the museum exhibit fabrics is to turn them into tote bags to sell in the Sandy Spring Museum's store.   I've been dyeing larger pieces of fabric to make sure there is coordinating fabric available for handles later.   I attempted to work with two extra strips of fabric for handles for the first piece and it was a pain to pin all 3 pieces down, so I quickly learned to simplify!

Another lesson in simplification has taken place.  One goal of the grant is to start working bigger.  No longer will 4 pieces of random printer paper work to frame up a piece for auditioning!   What to do?   Thank goodness for our local Plaza Art store.   They will give you a huge cardboard folder if you purchase a bunch of their fabulous fancy paper sheets.  I treasure the paper *and* the cardboard folder.   Today I sacrificed a cardboard folder in order to make an auditioning frame.   Ahhh...so much easier to use this free tool to gauge the right place to print the next layer.   I'll mark the edges with an erasable fabric marking pen before moving the frame.   

Blue shibori background for a Civil War piece
After doing Elizabeth Barton's exercise, "The List of Important Features", to learn about my personal voice, I determined that I admire designs based on grid structures.   I decided to fold and dye a simple shibori pattern that I knew would give me a grid structure to add interest to a background.   So far, so good!    The next challenge will be to integrate the printed and TAP layers with the shibori background. 

Carol Soderlund introduced me to another Christopher Alexander book - "The Luminous Ground."  This is the fourth book in his "The Nature of Order" series and deals with color.   Christopher Alexander proposes eleven color properties that relate directly to the first book's fifteen properties of wholeness (beauty).   Happily, shibori automatically creates the property "echoes" where similar patterns are created thereby echoing each other and building centers.   The corresponding color property is called "Family of Colors."   Shibori involves resist techniques where parts of the fabric receive the maximum amount of dye, resisted areas keep out dye to remain their original color and some areas only get a bit of dye resulting in tints.    Hence, you get a range of colors.   Shibori dovetails nicely with the project goals.  

"Love what you do and do what you love.  Don't listen to anyone else who tells you not to do it.  You do what you want, what you love.  Imagination should be the center of your life."  - Ray Bradbury

Wednesday, May 6, 2015

"Neutral Territories" Dye Class with Carol Soderlund

Neutral Territories is all about finding the blacks, greys and browns hiding in various combinations of MX reactions dyes.   In Carol Soderlund's workshop at ProChemical & Dye, we were not handed individual recipes to dye neutral colors.   Instead, we were taught how to search systematically for neutral colors.   I was delighted to expanded my grasp of color through this process.   Toss in some discharge and thickened dye exercises and it was dye heaven!

Here is one sample card from my notebook - all of the colors are closely related..  The row on top was my favorite neutral grey/black.  Some seemingly black colors on the right hand column  when lightened are shown to have blue, purple and reddish shades.  The lightest values on the left hand column become more similar as the dye is diluted.

Below is the sample card that I dyed in my search for browns given the dyes used for the grant:   tangerine, strongest red and deep navy.  I found the range of browns very pleasing.  Carol's exercises taught me to evaluate the samples.   I know that I'd like to explore browns with slightly less red and more yellow hue based on the colors below.  Additionally, I'll be breaking down these browns into value gradations (like the picture above) to understand them better and increase my color vocabulary.

The workshop included time for individual projects.   I noticed a fellow student, Laura, had put notches in an old credit card and was scraping with thickened dyes.  I decided to follow suit using the nine closely related brown dyes from above.   Our marks looked totally different.   Here is the credit card and the two pieces created using my freebie tool:


I still had dye left, so I did some stamping with a 16oz plastic cup, a plastic salsa cup, a wooden thread spool and a plastic core from Mettler thread.   I was thinking about Christopher Alexander's Property of Wholeness "Levels of Scale" when I chose my circles in 4 sizes.   The dye was applied thickly in places, so it dripped when I hung it up out of the way.  I'm going to think of this as a two techniques bonus...stamping and dripping.


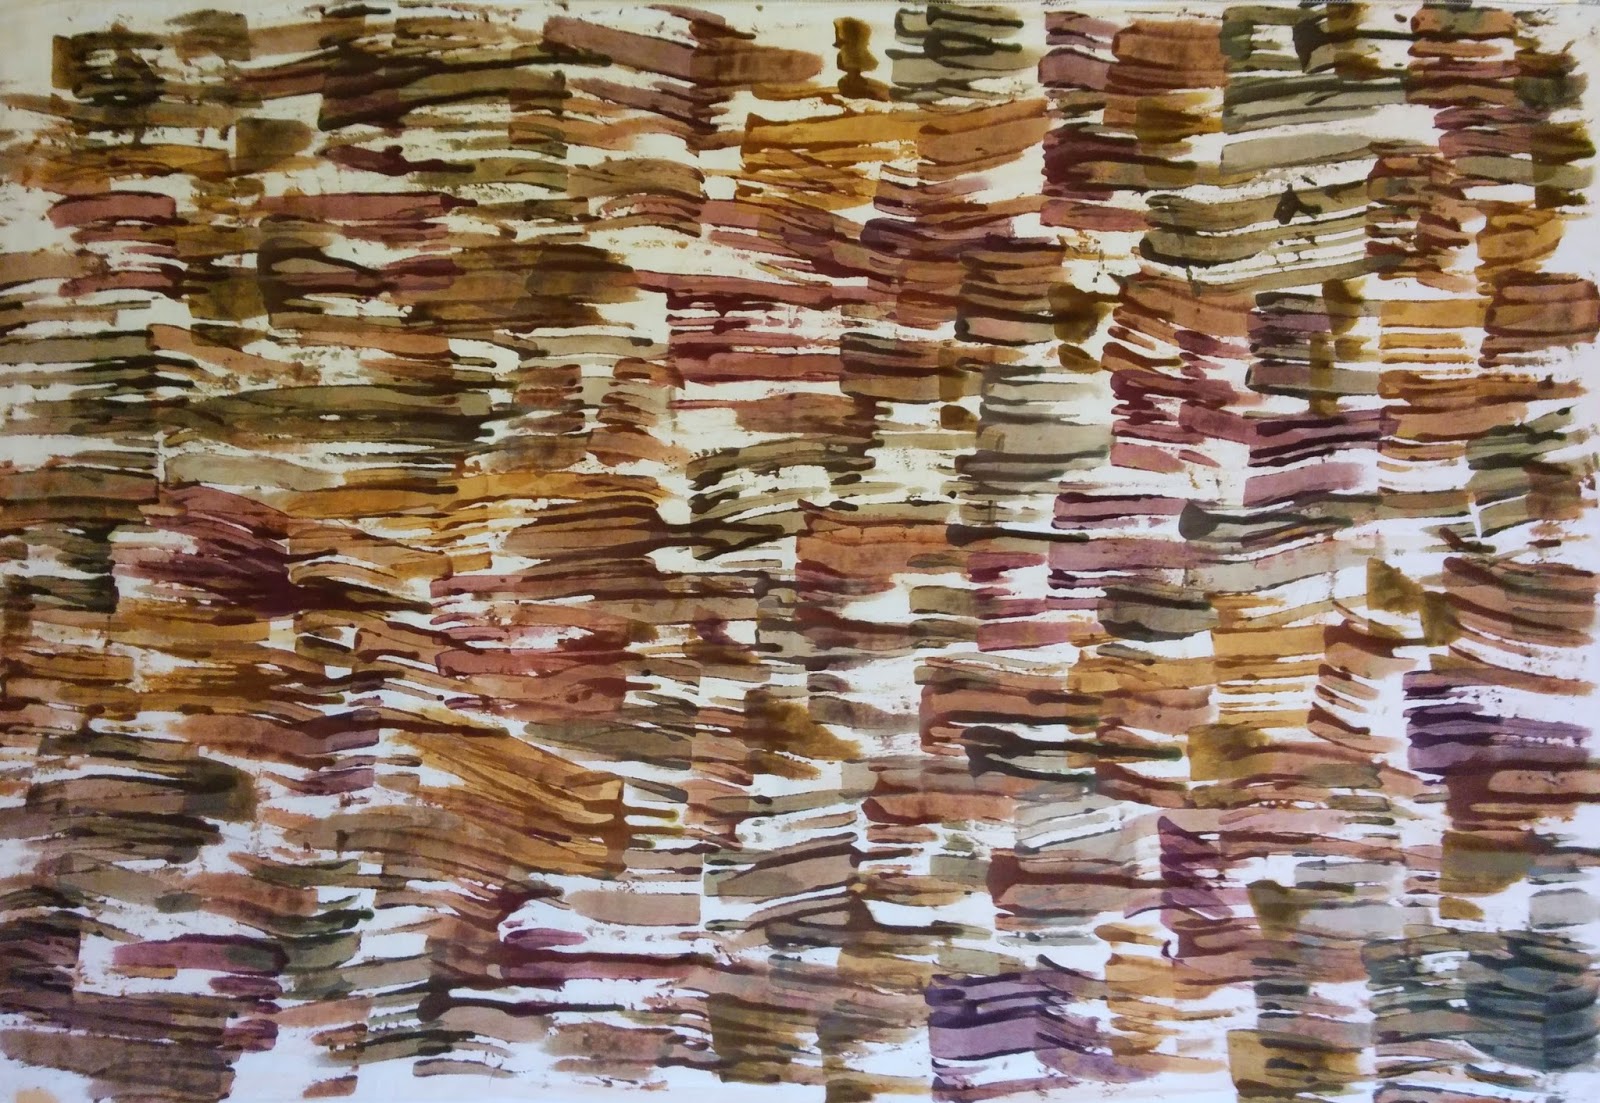
Messy plastic cups and dedicated brushes filled with a residue of thickened dye sat in front of me, but what to do with it?   I decided to add a bit of water and create dye washes to help clean up the brushes and cups.  Thickened dyes are *NOT* good for your drains!  It was a neat exercise in seeing how far the dye would go...  Once I had the stripes painted on the fabric, it occurred to me that I hadn't added soda ash anywhere along the line...ooops!   I scrunched up the fabric lengthwise and rolled it up like a cinnamon roll.  I stuffed it into a tight container (could't find a looser fit) and added some soda ash water.   I squirted some black dye on top of the fabric roll for good measure.   The error prompted me to create a piece more interesting than the original plan.   I love getting 2 visual layers for one dye process.


The last piece was created to use up the dregs of the dye washes.   I poured the remaining brown and black dyes into the bottom of a container and mopped it up with fabric that I had scrunched in my hand.  I rescrunched (it's a technical term despite what spell check is telling me...really...) the fabric in the container.   I squirted some leftover black dye on top and left it to batch.   Now I have a variety of related fabrics and very little wasted dye.
Scrunched fabric with colors breaking from a custom mixed black and browns.

Detail from the scrunched fabric above.

Dye companies such as ProChemical & Dye and Dharma Trading offer a few premixed browns, blacks and greys, but there are so many more available for the adventurous dyer!   Using the primary and secondary pure colors with neutrals blended from those dyes allow all of the colors used in a piece to harmonize.  Bright colors pop thanks to neutral colors.   The Neutral Territories workshop was inspiring.   It was my fourth color/dyeing class taken from Carol Soderlund.   She continues to offer new insights into color and dyeing.   I highly recommend her classes.   You'll find them well run, fun and chock full of information with excellent notes and samples to take home.