Saturday, April 25, 2015

Elizabeth Barton's "Find Your Style" Exercise Works!

The Potomac Fiber Arts Guild's members are encouraged to form small interest groups.   I'm lucky to belong to a group dedicated to studying design.  One of our members was inspired by a blog post from Elizabeth Barton -  "The List of Important Features."  Her article talks about the importance of personal style and how you can go about identifying your own.   Head on over to Elizabeth's blog to get her take on personal style...   

My design group decided to use Elizabeth's excellent style exercise, but with a twist.  A group member selects artwork that she's drawn to and presents it to the rest of the group.  The group feeds back what they see in the collection of artwork.   The presenter considers the group's opinion.  If the idiom "two heads are better than one" is true, then imagine how fabulous the seven heads are in our group!   I received the following feedback on my style preferences:
  • underlying grid
  • an organic feel
  • lots of orange/blue complements
  • layers of texture and pattern
  • representational imagery, but non-dominant
  • collage
  • strong use of line
This led me to create a grid structure for the background of my next grant piece.   An organic feel is incorporated by softening the edges of the grid.   I tried using some new screens, but the solid rectangles lacked interest.   I dug out some old screens that I'd used to run a screen printing event a few years ago.  I'd tucked them away to rescreen eventually.  The small amount of texture afforded by the randomly clogged screens was much more interesting when printed.   I can see that some orange and blue snuck into the composition.   Additional layers of dye, stitch, TAP paper and whatever else inspires will give the piece additional layers of texture and pattern, as well as, adding some representational imagery.
 Torn blue painter's tape is used on the printing screen to break up the straight lines.   
I am deliberately making my pieces larger than the 20"x33" size required because the fabric pieces will be made into tote bags to sell in the museum's store after the exhibit ends.   The extra fabric is required for straps.   It made me realize that I need to make a viewfinder tool that windows the 20"x 33" size, so that I print the next layer in an appropriate spot.   I'm off to raid my cardboard stash!

Draft Artist Bio + Blog Pages

I've finally been called out - I need to submit an artist bio...in under 200 words.   People like me can't sneeze in less than 200 words!   Fortunately, there is help out there on the Internet.   I used this article entitled "How to Write a Good & Effective Artist Biography" as my guide.   I answered their list of insightful questions and had the basis of my bio ready to write.   Many thanks to the Light Space & Time Online Art Gallery for offering up this useful tool.   I welcome any constructive critiques...  I now have a head shot to pair with it. Two more artist tools for my toolbox.


Diana Guenther was hooked early on fiber arts.  She was begging to embroider at age 5, took sewing lessons at age 8 and knitted the endless scarf thanks to Grandma at age 9.  
Fiber is part of her daily life.   She delights in the tactile satisfaction and accomplishment of making.   She especially loves the controlled chaos of large scale projects.   She thrived on felting with preschoolers, screen printing t-shirts with Girl Scouts and tie-dyeing with the swim team.   Art is about making and sharing making.
Diana turned her talents to winning art grants as the PTA’s cultural arts officer.   As the kids grew, her art-enabling included demonstrating and teaching spinning.   She loves to learn from other artists too.   She sought out workshops with leading artists including Jane Dunnewold, Elin Noble and Carol Soderlund.   Diana banded together with small groups of like-minded artists to explore design theory and surface design techniques.   Art provides intellectual challenge.

In 2014, she won an art grant from the Potomac Fiber Arts Guild to create an exhibit of surface design pieces based on the collections of the Sandy Spring Museum of Olney, MD.   Diana is currently designing fabrics with visual depth and rich historic content.

Writing the artist bio also nudged me to learn how to add pages.  Pages are used for static information that you always want to have available.   It wasn't hard.   I just had to go back to the layout and find the right gadget.   The upper right hand blog column now offers key information about this blog:   the artist biography and grant application.   The artist resume is coming soon...

Tuesday, April 14, 2015

Curriculum Vitae/Artist's Resume

One of the goals of the grant I received from the Potomac Fiber Arts Guild is developing the tools of a working artist.  The "Exhibit Summary Form" that I'm filling out for the Sandy Spring Museum requires a curriculum vitae.  It's time to create that tool...

I've written resumes before, but never a curriculum vitae.   I wondered how they differed.   There's a wonderful article entitled "Curricula Vitae (CVs) versus Resumes" from the University of N.C. at Chapel Hill's Writing Center that cleared the issue up for me quickly.  Resumes cover education and work experience.   I have none.   A curriculum vitae covers more of your life experience.  I do have fiber related volunteer work, workshops taken, classes taught, grants won, guild memberships and study groups in my background.  Clearly, a C.V. is the way to go! 

What a relief to find this article:  "How to Write an Artist's CV When You Don't Have Much (Or Any!) Professional Experience."   Thanks to thepracticalartworld.com  for shortening my learning curve.  I've created a blog page for my new C.V. and linked it to the top right hand column of the blog.  Done! 

Civil War Artifacts + Exhibit Title

Like many folks living in the Washington, DC metro area, I wasn't born here.   I know the broad strokes of American history, but discovering artifacts that highlight local history bring Sandy Spring alive for me.   At times the Quaker culture of Sandy Spring was at odds with much of the nation. This makes Sandy Spring a pretty interesting place. I was looking thru the archives for photos of Civil War soldiers last week and having little luck...until I thought it through.   Oh yeah!   Quakers are pacifists.   The absence of material was telling in this case.  Nevertheless, a few artifacts from the Civil War found their way into the Sandy Spring Museum collection.
Sandy Spring Museum Collection - Civil War Button - Maryland Officer's Uniform Button
A quick trip to www.relicman.com found a photo and description of the button above. 
 "Button depicts state seal of Maryland, a shield with a fisherman, farmer, and eagle.  Manufactured before the war, intended for officers of Maryland militia units, who generally sided with the South but served both sides.  Backmark: "CANFIELD. BRO & CO. / BALTIMORE." dm between rings of dots, Scovill produced ca 1860"

I found it interesting that Civil War button and belt buckles are described on-line as dug versus non-dug.   The button above looks non-dug, but the belt buckle story infers that the buckle was dug up on a farm.   You learn something new every day...
Sandy Spring Museum Collection - Civil War Belt Buckle from a Union Soldier - Found on Hutton Farm August 1963
One of my current tasks is to refine my ideas for the exhibit.  I need an exhibit title, theme and 150 word statement for marketing purpose that sums up why you should come see my work.   The timeline concept that I've been working on has problems:   
  • a timeline is not an inspired, zippy presentation
  • many of the artifacts are not currently dated
  • the artifacts are not evenly distributed thru time (older = scarcer)
I was planning to start with the Native American artifacts (oldest man made items in the collection) and work my way up to recent times.   Now I am thinking that approach would not take advantage of the best the collections have to offer.   

What have I learned about the artifact collections?   The museum started collecting in 1981.  Items were frequently donated from estates.   So, it makes sense that a lot of artifacts donated were from the first half of the twentieth century.   These later artifacts tended to have more information associated with them.   Live and learn!   I wasn't able to elicit information about the character of the archives when I started the project, but I'll be sure to ask probing questions the next time I approach a collection.      
 
Reviewing the artifacts was like Cracker Jacks - "a prize in every box!".   Items are stored by accession date (when it was entered into the collection), so boxes are typically filled with random items.   I loved slotting each artifact into it's historical context.   Next, I'm contrasting calling cards versus texting and button hooks versus Velcro to consider how life has changed.   Unsafe tin dishes are outdated along with mercury-laden blood pressure cuffs.   Some of the artifacts pointed to bigger stories.   The bank letter to the local Grange stating that they would not continue to automatically invest the Granges' money in a failing Florida railroad had me scrounging for the dates of the Great Depression.  Score!   I loved the stories big and small.   Each vignette helps to evoke Sandy Spring's past as it evolves over time.   I want to convey the excitement of discovering Sandy Spring one artifact at a time.

My first working title was "The A.H.A. Moment:   Artifacts as Historical Ambassadors."  It wasn't universally embraced by the museum staff, but I'm told that I'm moving in the right direction.  Perhaps "Discovery:  Sandy Spring" would be more concise, if not very descriptive?  How about "Sandy Spring:  Going with the Flow and Bucking the Tide" superimposed on a tasteful chamber pot?   O.K., that was silly, but I did find a chamber pot in the collections.   You may be relieved to know that the museum director and marketing guy at the museum are prepared to step in and help name this exhibit.   In the meantime, I'm leaning towards "Dyeing to Tell a Story" as it references creating the unique one of a kind surface designed fabrics and the story telling I plan to do with the museum's objects, photos and documents.  Wish me luck in this next phase of exhibit design.   ...and place catchy title suggestions in the comments...   Thanks!

Sunday, April 12, 2015

Research Upgrade + The Home Improvement Society

Sandy Spring Museum is on their third archivist since I won the grant in May 2014.  The turnover has slowed down my researching.  When the latest archivist arrived, I was off tending another ring in my circus.   That's life...   The new archivist brings experience from the Textile Museum in Washington, DC, so I'm really looking forward to her input.

I met with the museum staff recently about moving forward with the research and starting the exhibit planning phase.   They've helped me regroup.  I am grateful for their guidance.   Previously, I was looking thru individual boxes of artifacts starting from those earliest accessioned into the collections (1981).   It's been a slow way to work, yet a quarter of the way thru it's given me a good feel for the archive collection.  The archivist has committed to pulling documents and photographs from e-mailed requests now that I've got specific fabric pieces that I'm designing.   I have finally narrowed my focus beyond a general timeline.   This is great news!


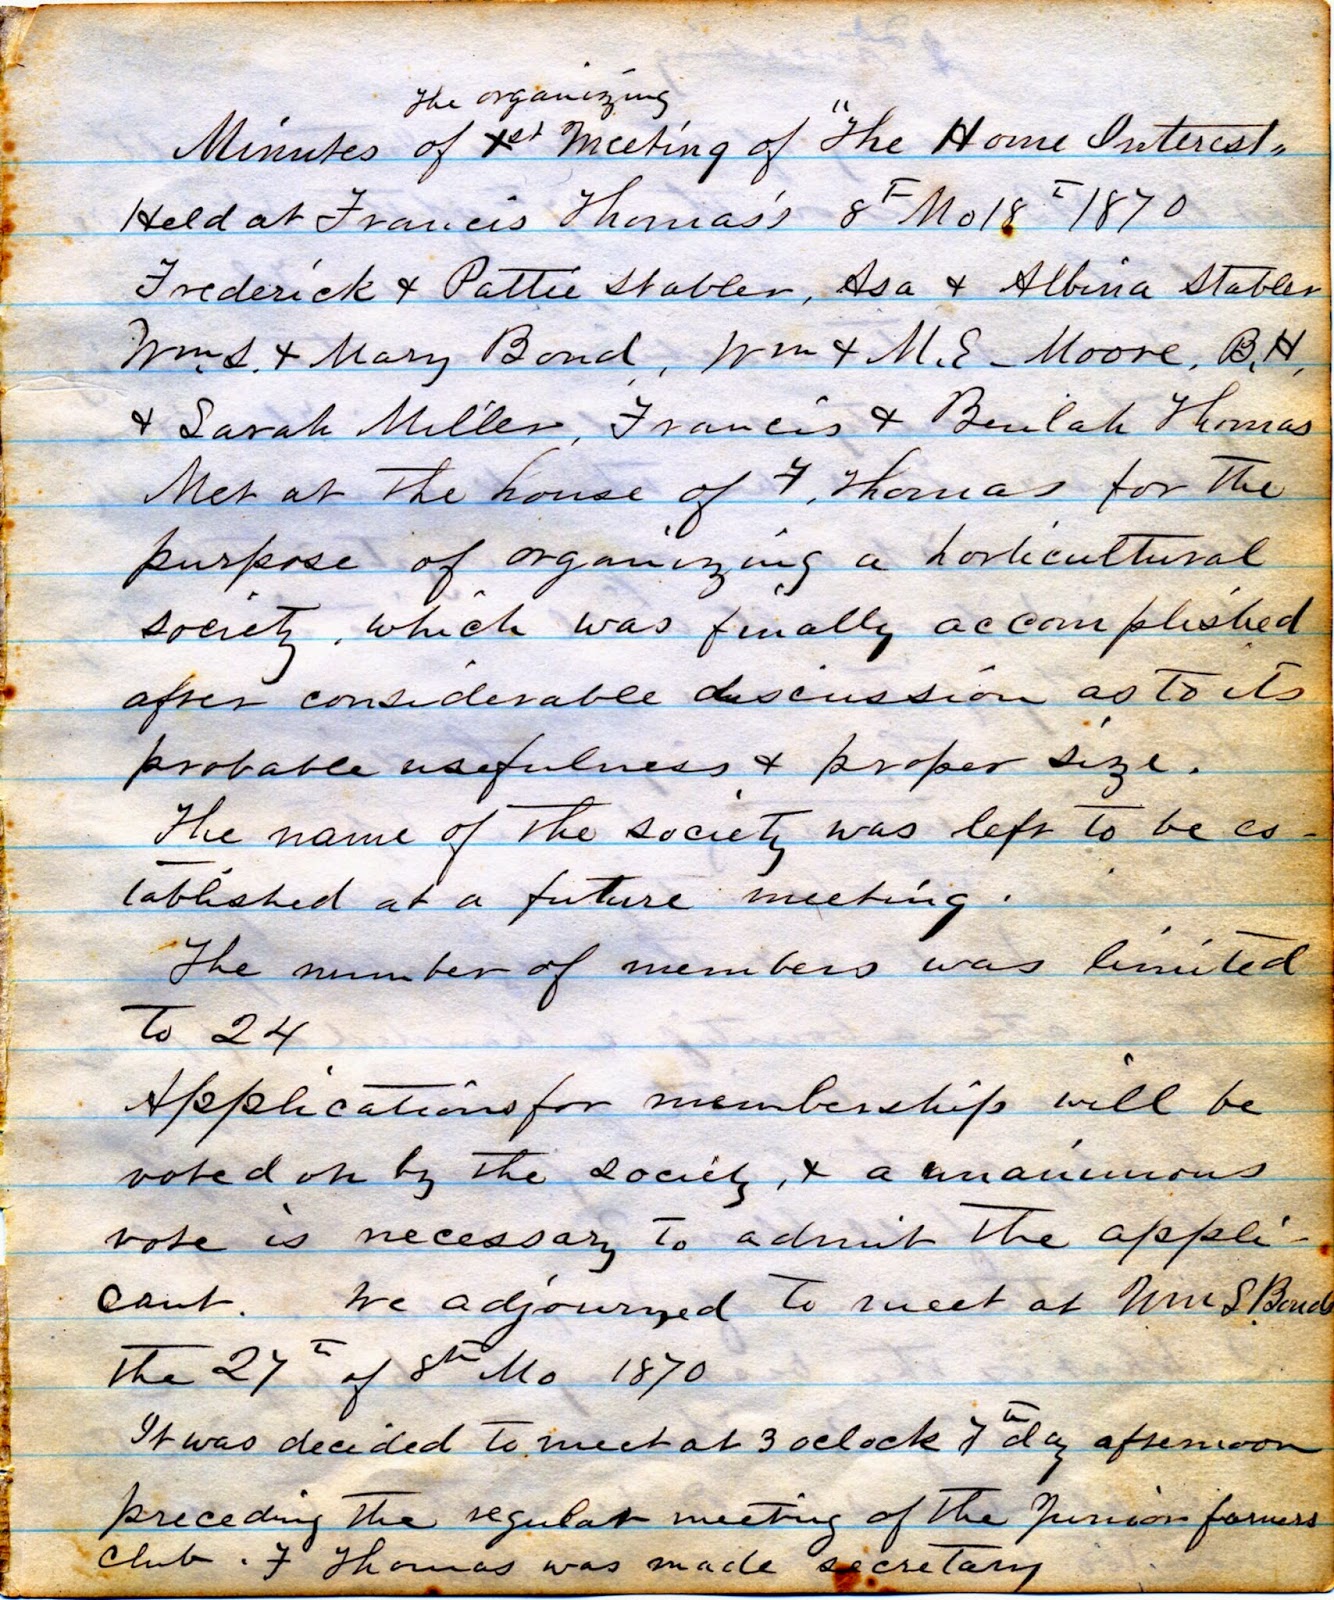
At the end of March, I sent in my first request list.   I'd found a photocopy of the Home Improvement Society showing women in old fashioned garb sitting in a room with a few sewing machines.   It intrigued me as a sewer.  I also wondered if this was part of the early organizing that led to the Women's Rights Movement.   Bingo!   I was provided with several newspaper articles and photos that I'd requested based on the collection catalogs.   In addition, the new archivist presented me with a vertical file of materials collected about the society.  On top of that, I received a box including all of the early minutes from the society.   Wow!   I suspect that the society's notes would be the basis of a very interesting exhibit.   I was able to hold the first notebook of minutes from 1870 in my white gloved hands.   It was an honor to look into that time capsule.  In terms of surface design, the handwritten pages were fabulous.

It was delightful to discover that the society is still meeting today.  The archivist was recently invited to attend the next meeting of the society.   What an amazing coincidence...  I was disconcerted to find that the Home Improvement society was actually organized by six married couples with an interest in horticulture in 1870.  This clashed with the notes on the Mutual Improvement Society being founded in 1857.  What about the photo above that references the Women's Association?   The newspaper articles indicated that the Mutual Improvement Society was the oldest women's organization in America.  Are we talking about two or three different groups?   I've found a number of names that overlap.  It was all tucked together in one vertical file.   Hmmm...I guess history isn't always clean cut.  

Either way, it was fascinating that the Quaker model was responsible for the ability of the local women to organize.   It wasn't seemly for women in the 1800's to hold office.   A woman couldn't be a president or a treasurer.   However, Quaker meetings held individuals as equal in status with a single clerk voted on to guide the meeting.  This allowed Sandy Spring's women to be in the forefront of social progress. 
 

Tuesday, April 7, 2015

Procrastination Station - The Dreaded Draft Post Blogging Build Up

Does anyone else live in Procrastination Station?   The rest of my life got busy and I let ugly "draft post build-up" happen.  Excuses were along these lines:
  • Sure, I can do the final edit on that post later...  
  • Oh, that post just needs a few more photos...  
  • Uh oh - I've leapfrogged this post and already talked about some of the material...
However, I'm not going to let it bug me or get my goat...
Sandy Spring Museum Artifact - Beaded Headband - c. 1915-1919 - Part of a Camp Fire Girl Costume
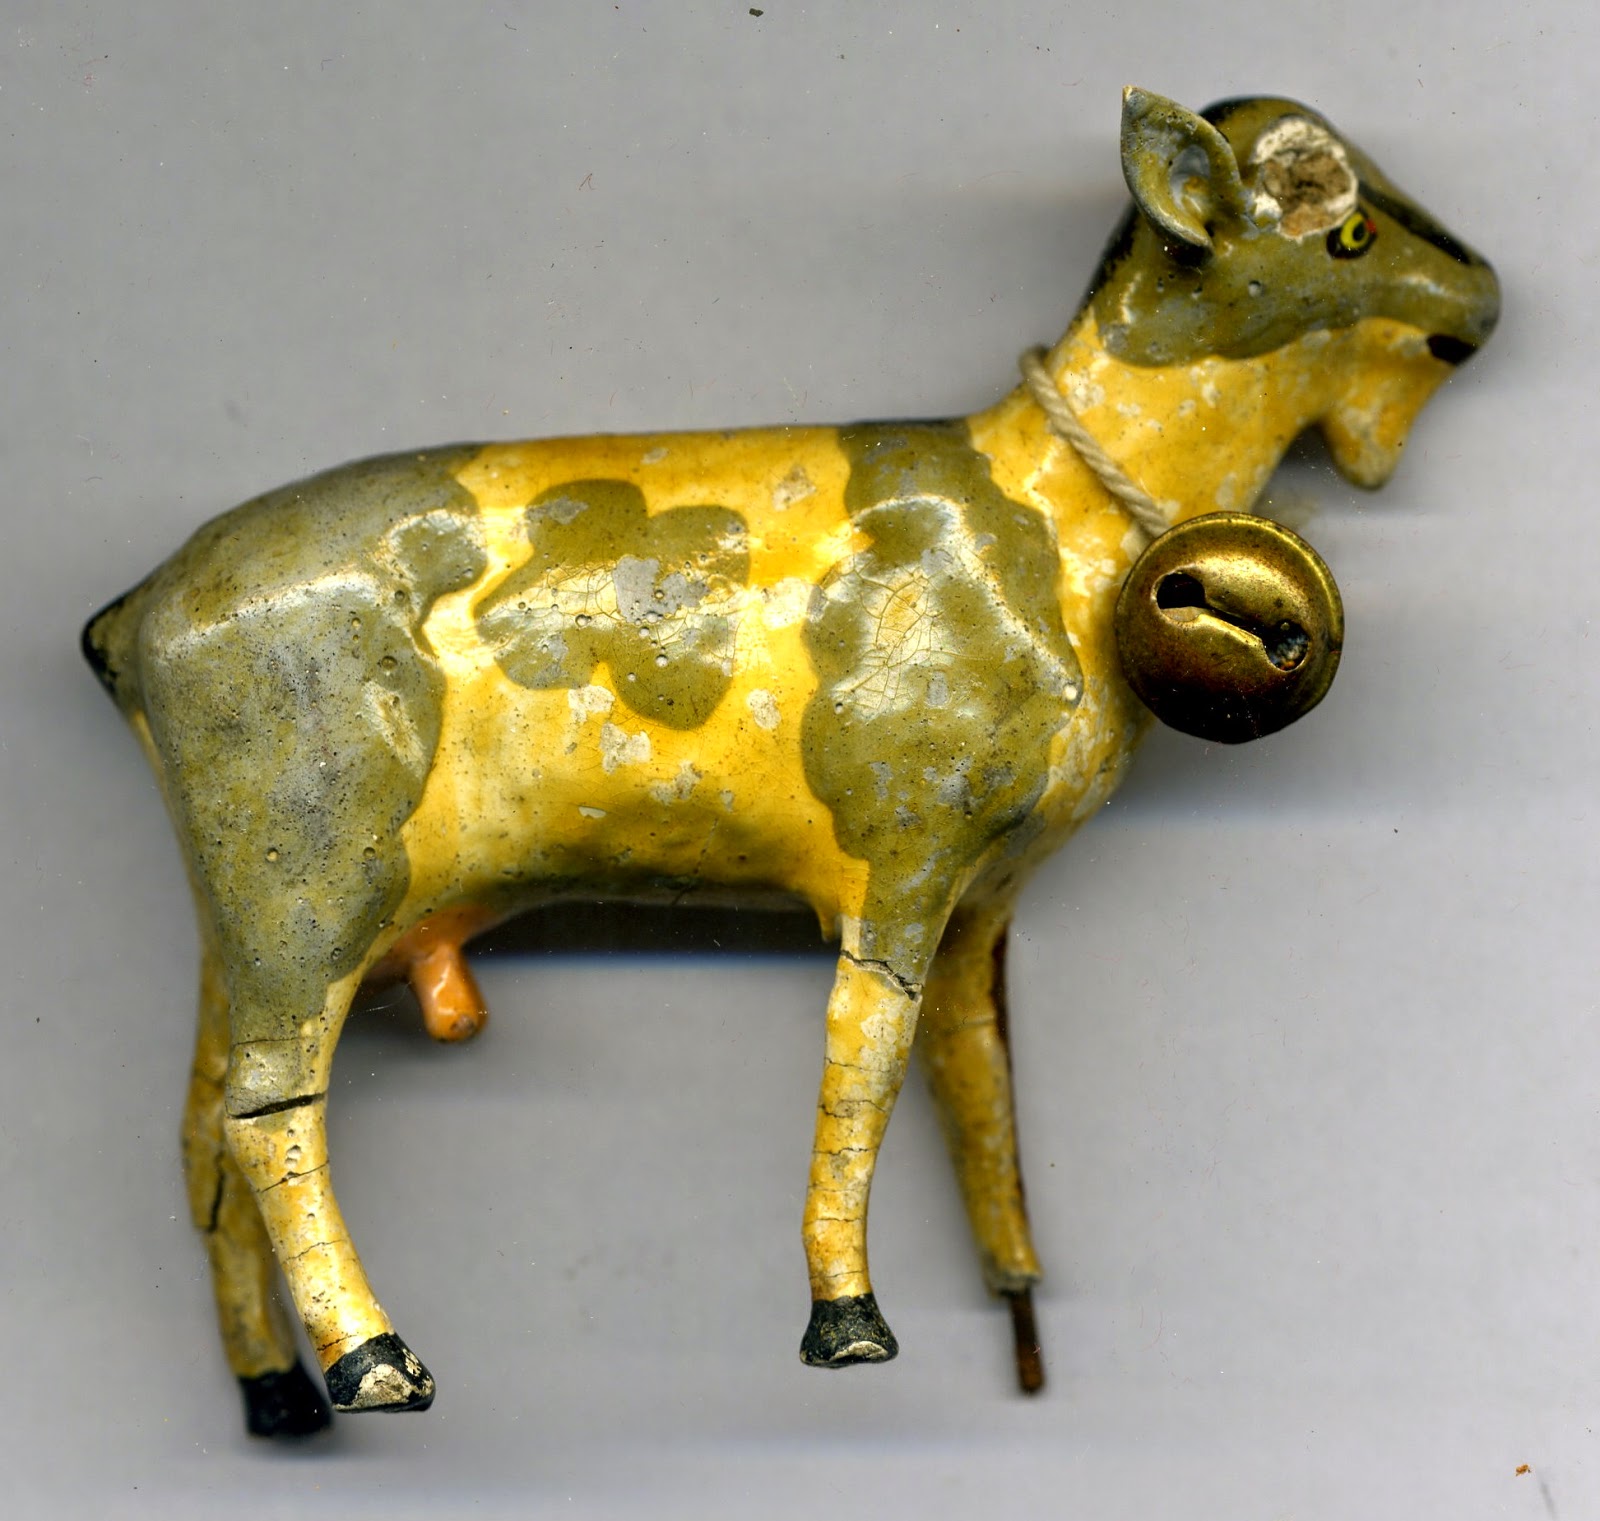
Sandy Spring Museum Artifact - Plaster Goat - undated - Part of a Nine Piece Farm Animal Set 

Instead, I finished up the promising posts in March and cut the lame ones loose.  I've watched the Blogger stats.  Naturally, you get fewer hits when there's nothing new to see. My new blogging goal will be better pacing:-)   

Monday, April 6, 2015

Diane Franklin's Book "Dyeing Alchemy" + Dye Calculator

If you use Procion MX dyes or want to learn how, then I have a treat for you.   Check out Diane Franklin's self published book "Dyeing Alchemy - A Primer About Procion MX Dyeing."   I admit to paging thru it shamelessly first for the artwork.   Diane excels at Shibori, but has experience in a wide array of dyeing techniques.   She's shared the work of other fiber artists too which keeps you flipping pages.


 I am impress at how thoroughly she covered the topic of Procion MX dyes. You will learn about:

  • the history of Procion MX dyes 
  • how the dyes work chemically
  • the 14 pure dye colors (great comparison chart for purchasing at ProChemical & Dye, Dharma Trading and Jacquard)
  • color theory/mixing dye colors
  • immersion dyeing with powders versus stocks
  • hue gradations and value gradations
  • pyramid dyeing (creating related fabrics from 2 or 3 dyes)
  • dyeing safely
  • supplies and equipment
  • recording your dyeing efforts
  • setting up a dye work space
  • planning an efficient dye day
  • going beyond the basics (think snow dye, thickened dye, painting with unfixed dyes, fabric manipulations, overdyeing, thread dyeing, and more)
  • dye suppliers
  • recommendations for books, DVDs and workshops
All of this information is a valuable resource for me and a real bargain at under $18.  However, what really sold the book for me was the dye calculator.   I'm working to improve my dyeing process.  I want repeatable results.   However, dyeing some days looks like the dreaded word problem...   
If Diana is dyeing a piece of cotton fabric that weighs 1.62 gram and she wants 4% depth of shade using a 5% dye stock, then how much urea, soda ash, salt and dye does she need?   
Some days this feels like a lot of math...   I have the formulas.   I know how to calculate everything (mumble, mumble...if I get out my notes and think about it...)   The joy of plugging in a few numbers and having the answers magically appear is pretty appealing!

I had the pleasure of meeting Diane at a dyeing workshop.   She advertised her dye calculator as a time saving tool that would allow me to frugally use just the right amount of chemicals - urea, soda ash, salt, dye - to get the color I wanted.  Save *time* AND *money*?   I haven't been disappointed.   Many thanks to Diane Franklin for putting out a great tool for fiber artists.